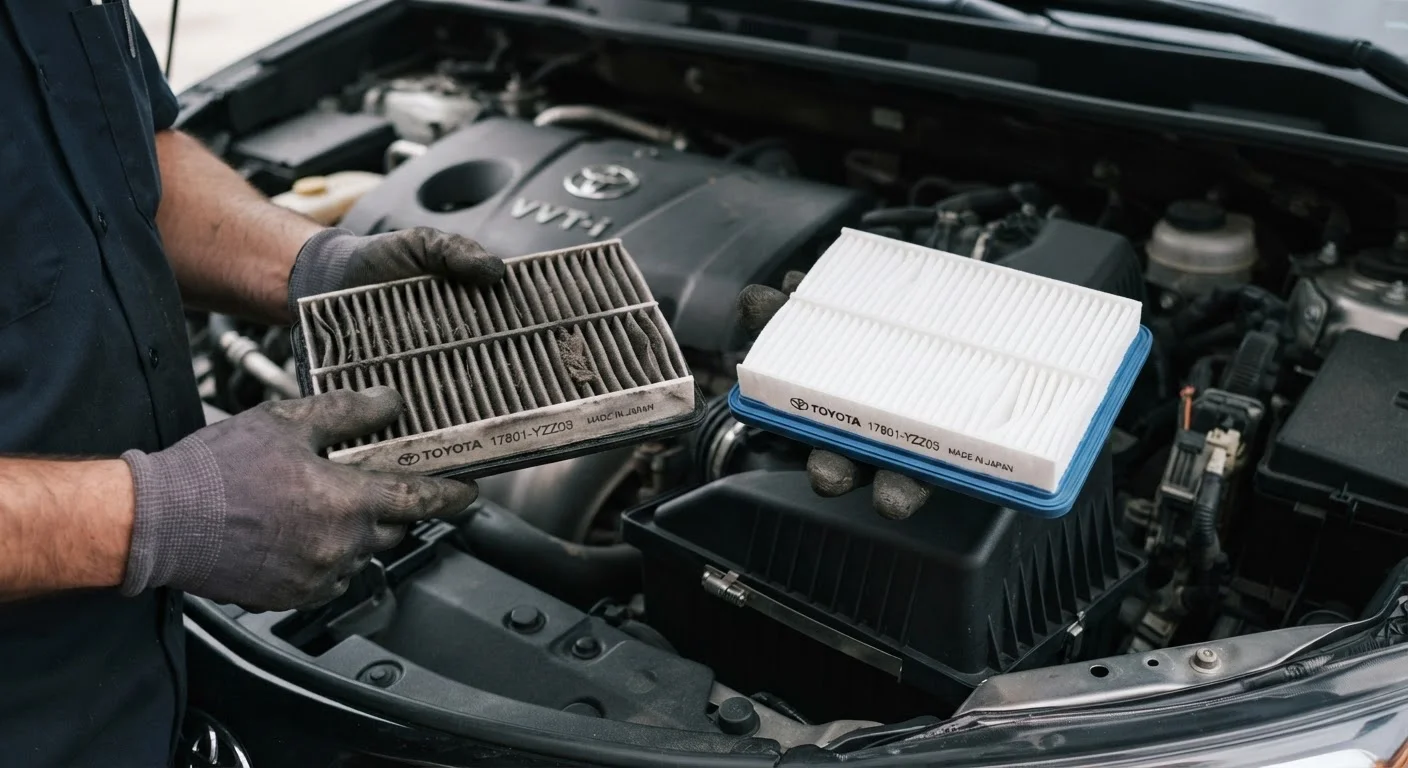
Why the Air Filter Matters
Your engine needs a precise mix of air and fuel to run. The engine air filter sits between the outside air and the engine intake, trapping dust, pollen, road grit, and other debris before they reach internal components. When the filter becomes heavily loaded with contaminants, airflow is restricted - and your engine has to work harder to compensate.
The practical consequences can include rougher idling, sluggish acceleration, and in some cases a drop in fuel economy, though the degree varies by vehicle and driving conditions. More importantly, a severely clogged filter can allow fine particles to bypass the media and enter the engine over time.
Most manufacturers suggest inspecting the filter every 12,000-15,000 miles and replacing it every 15,000-30,000 miles, but drivers in dusty or rural environments may need to swap theirs out more frequently. Your owner's manual is the definitive source for your specific vehicle. For a broader look at what routine inspections should cover, see the seasonal car check guide.
Match the Filter to Your Exact Vehicle
Filter dimensions vary significantly between models, and even between engine variants of the same model year. Always confirm the part number using your owner's manual or the vehicle identification number (VIN) lookup at an auto parts retailer. An ill-fitting filter can allow unfiltered air into the engine or fail to seat correctly in the housing.
What You'll Need Before You Start
Air filter replacement requires no mechanical experience and, in most vehicles, no tools at all. Here's what to have ready:
Replacement air filter
The new filter matched to your vehicle's make, model, year, and engine size - verify fitment using your owner's manual or an auto parts store lookup tool.
Flathead screwdriver
Used to release any metal clips or pry open stubborn housing latches on some vehicles.
Clean cloth or shop towel
For wiping out any loose debris inside the air box before installing the new filter.
What you will need
Step-by-Step: Replacing the Engine Air Filter
Follow these steps carefully. The process is broadly similar across most vehicles, but always cross-reference your owner's manual if you encounter anything unexpected.
Locate the air filter housing
Pop the hood and look for a large plastic box - typically black - connected to a wide duct that leads toward the engine. In most modern vehicles it sits prominently near the top of the engine bay. If you're unsure, your owner's manual will include a labeled diagram.
Open the housing
The housing lid is usually secured by two to four metal spring clips, wing nuts, or plastic tabs. Unfasten each one and set aside any hardware in a safe place. Some vehicles use hose clamps on the intake duct - loosen these before lifting the lid fully.
Remove the old filter
Lift the filter straight out of the housing. Note which direction it sits - most filters are directional or shaped to fit only one way. Hold it away from the clean intake side to avoid dropping debris into the engine intake.
Inspect and clean the housing
Look inside the air box for accumulated dust, leaves, or insects. Use a clean, dry cloth to wipe the interior surfaces. Do not use compressed air directed into the intake pipe - this can force debris deeper into the intake system.
Install the new filter
Place the new filter into the housing in the same orientation as the old one. It should sit flush without forcing. Reattach the housing lid, securing all clips, tabs, or wing nuts firmly. Reconnect any hose clamps or sensor connectors you moved aside.
Close the hood and verify
Start the engine and listen for any unusual sounds such as a hissing noise, which can indicate an air leak around the housing. If everything sounds normal, you're done. Record the mileage and date so you know when the next inspection is due.
This task fits squarely within the range of maintenance that careful owners can confidently handle themselves. For a balanced overview of where DIY makes sense - and where it doesn't - see DIY car maintenance: where it makes sense.
Signs Your Filter Needs Changing Ahead of Schedule
Mileage intervals are a useful baseline, but real-world driving conditions vary considerably. Watch for these indicators between scheduled changes:
- Visible dirt accumulation: A filter that looks uniformly dark gray or brown across most of its surface is likely due for replacement.
- Reduced throttle response: If acceleration feels noticeably sluggish compared to normal, restricted airflow is one possible cause worth investigating.
- Check engine light: A dirty filter can trigger a mass airflow sensor code. Don't assume - read the code before replacing parts.
- Increased fuel consumption: Worth monitoring if you track your MPG regularly, though many factors influence fuel economy.
Keep in mind that some of these symptoms overlap with other issues. If replacing the filter doesn't resolve a performance concern, have a qualified mechanic inspect the vehicle. As part of a broader maintenance routine, the car maintenance guide from purchase to high mileage puts filter care into the full-vehicle context.