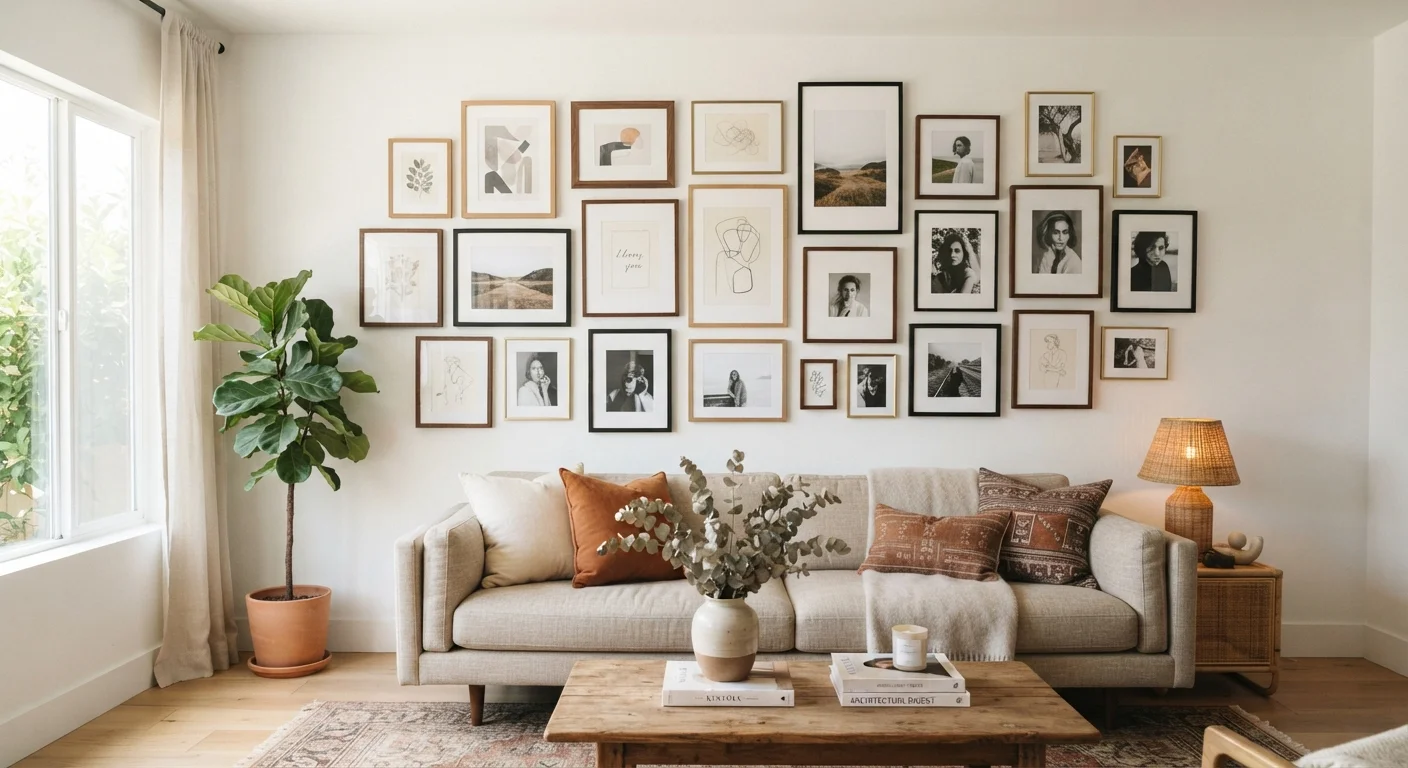
The 57-Inch Rule and When to Break It
Most professional picture hangers and interior designers use a simple baseline: hang artwork so its visual center sits 57 to 60 inches from the floor. That range aligns with average eye level for a standing adult, which is why galleries and museums almost universally follow it.
Measure from the floor to 57 inches, mark that point lightly in pencil, then position the center of your piece at that mark. From there, calculate where the hook or nail actually goes by measuring the distance between the hanging wire (pulled taut) and the top of the frame, and subtracting that from 57 inches.
There are legitimate reasons to adjust this baseline. In rooms where people primarily sit - a dining room or a TV lounge - dropping artwork to 54 inches places it closer to seated eye level, which feels more natural. Conversely, staircase walls follow the slope of the stairs: keep each piece's center roughly 57 inches perpendicular from the stair tread beneath it, rather than from a flat floor. For a small bedroom, hanging art slightly lower over the bed headboard - around 6 to 8 inches above it - grounds the arrangement and makes the ceiling feel less distant.
Before marking the wall, hold the frame in position and take a photo on your phone. Zoom in and check the placement relative to surrounding furniture - your eye adjusts quickly in person, but the photo shows the full picture objectively.
Photographers and stagers use this technique because the camera's flat perspective reveals proportion errors that our brains compensate for when we're standing in the room.
For a gallery wall with mixed frame sizes, choose your anchor piece first and work outward - never start from a corner or edge and try to fill toward the center.
Starting from the anchor creates a visually balanced composition naturally; starting from a corner almost always produces a lopsided result that's hard to correct without starting over.
Choosing a Layout for Your Wall Space
Before you reach for a hammer, assess the wall. Consider its width, any architectural interruptions (outlets, windows, doors), and the furniture sitting in front of it. A general principle: artwork should span roughly two-thirds the width of the furniture below it. A sofa that's 84 inches wide pairs well with a single large piece or a grouped arrangement that collectively measures roughly 56 inches wide.
Four layout categories cover most situations:
- Solo statement: One large piece, maximum visual impact, minimum complexity.
- Symmetrical pair: Two identical or similarly sized frames flanking a central point - suits formal rooms and hallways.
- Grid: Uniform frames in rows and columns; works well with photography series or botanical prints.
- Salon-style gallery: Mixed sizes arranged organically around a central anchor piece; most forgiving and currently the most popular.
If your walls need attention before hanging anything, review how proper wall preparation works - patched holes and primed surfaces make a real difference to the finished result. You might also consider whether a feature wall treatment would add more impact than artwork alone.
Hanging a Solo Statement Piece
Single large pieces are the most straightforward hang, but proportion errors are highly visible. Use these checkpoints:
- Confirm the wall can handle the weight. Most standard frames under 20 pounds are fine with a picture-hanging nail driven at a 45-degree angle into drywall. Heavier pieces need a stud or a wall anchor rated for the load.
- Find your mark. Measure to 57 inches, make a faint pencil dot, then calculate hook placement as described above.
- Use two hooks for wide pieces. A single hook lets large frames swing out of level with any vibration. Two hooks spaced 12-18 inches apart - both at the same height - keep the piece stable.
- Check level before releasing. A small spirit level on the top edge of the frame is faster and more reliable than eyeballing.
Use Painter's Tape for a Dry Run
Before committing a nail, cut a piece of painter's tape the exact width and height of your frame and stick it to the wall. Step back, live with the placement for a day, and adjust as needed. This costs nothing and prevents the most regrettable holes.
Building a Gallery Wall Step by Step
Gallery walls reward planning and punish improvisation. The floor-plan method saves significant patching later:
- Gather all frames and arrange them on the floor in front of the wall until you're satisfied with the composition. Photograph the arrangement for reference.
- Trace each frame onto kraft paper or newspaper, cut out the shapes, and label them. Mark the hook position on each template.
- Tape the templates to the wall with painter's tape, starting with your anchor piece (usually the largest or most visually prominent) near the center, then building outward. Step back frequently.
- Maintain consistent gaps. Two to three inches between frames creates visual cohesion. Use a ruler or a scrap of cardboard cut to your chosen gap size as a consistent spacer.
- Nail through the templates at the marked hook positions, then tear the paper away and hang each piece.
This approach is especially valuable in the context of a broader room refresh. See the room planning checklist for other measurements and decisions worth confirming before you commit.
57"
Standard artwork center height from floor
Used as a universal standard by professional gallery curators and interior designers across the US.
2-3"
Ideal gap between gallery wall frames
Interior design professionals consistently recommend this range for visual cohesion without frames appearing cramped.
16"
Typical stud spacing in US residential construction
Standard framing practice in most US homes; always verify with a stud finder before relying on this assumption.
Hardware, Anchors, and Wall Types
Choosing the wrong fastener is the single most common cause of artwork falling - and wall damage. Match your hardware to the wall:
| Wall Type | Light Pieces (<10 lb) | Medium Pieces (10-30 lb) | Heavy Pieces (>30 lb) |
|---|---|---|---|
| Drywall | Picture nail at 45° | Hollow-wall anchor or stud | Stud required |
| Plaster | Hardened picture nail | Toggle bolt or stud | Stud required |
| Masonry / Brick | Masonry nail or adhesive hook | Masonry anchor + screw | Masonry anchor + screw into mortar |
To locate a stud, use an inexpensive magnetic or electronic stud finder, then confirm with a small nail probe before committing. Studs in US homes are typically spaced 16 inches apart. Never rely solely on adhesive strips for pieces over the manufacturer's stated weight limit - ambient humidity and wall texture both reduce adhesion over time.
Know Your Weight Limits Before You Hang
Oversized mirrors, heavy canvas frames, and multi-piece installations can exceed 50 pounds. Always verify the load rating of your chosen hardware against the actual weight of the piece. When in doubt about structural anchoring - particularly in older plaster walls or masonry - consult a qualified handyperson or contractor rather than guessing.
Common Mistakes and How to Avoid Them
Even experienced decorators make these errors. Knowing them in advance prevents unnecessary rework:
- Hanging too high. The 57-inch rule exists precisely because the instinct to hang artwork at eye level while standing on a step stool leads most people to hang pieces 6-10 inches too high.
- Ignoring furniture relationships. Art that floats too far above a sofa or bed looks disconnected. Keep the gap between the top of the furniture and the bottom of the frame to roughly 6-10 inches.
- Mixing too many frame styles randomly. In a gallery wall, variety is good; chaos is not. Anchor the arrangement with a consistent element - all black frames, all light wood, or a unified mat color - so diverse pieces still read as a set.
- Forgetting to account for wire sag. When you pull the wire taut to measure hook placement, replicate the tension that the frame's weight will create. Under-tensioning means the hook ends up too high and the frame tilts forward.
- Skipping the level check. A frame that's even slightly off-level is distracting and becomes more obvious over time. A 4-inch torpedo level costs very little and removes all guesswork.
For broader decorating context, the guide Starting From Scratch covers how artwork fits into the overall visual hierarchy of each room - a useful reference if you're coordinating multiple walls at once. All practical home improvement projects, including picture hanging, sit within the wider scope of home improvement guidance available on this site.